Showing posts with label Spain. Show all posts

Sunday, June 2, 2013

#135 Salt Encrusted Fish


The first time I saw an image of salt-encrusted fish, I was determined to find out how to make it. I still had 2 fresh fishes to cook, but I wondered if trout would be a good fish to use, I got  more curious about it. The Mckays gave me 3 fresh fishes that they caught from the well maintained and stocked community lake, and it's the freshest fish I could get from this part of the world at 5,600 above sea level. I still haven't caught my own fish, no luck so far.
This spanish style of cooking requires a lot of salt. Atleast two pounds, depending on the size of your whole fish. My advice, start with two pounds, you can always add later when you need more. Was it worth the 2 pounds of salt? Yes! Was it wasteful? Absolutely not. The money that you pay for the salt is nothing compared to the moist, delicately flavored fish that you will get- absolutely worth all the salt in your pantry and besides, salt is not expensive anyway! To those who are wondering if the Trout was good, a big yes! I think it is important to use fresh fish only, since it tastes so much better than frozen ones. Trout should be included in the list of fishes recommended for Baked Salt Encrusted Fish. It was delicious! The preparation is very simple and quick.


Here's how to make it:
  1. Clean and scale the fish. Then  pepper the insides.
  2. Stuff the cavity of the fish with the following: fresh parsley, fresh dill, and fresh lemons.
  3. Mix 2 pounds of coarse salt and 3 egg whites of large eggs.
  4. Make a bed of the salt mixture for the fish, then lay the fish on top. 
  5. Pat salt on top of the fish until it is fully covered.
  6. Preheat oven at 475 F degrees, then reduce heat to 400 F degrees and then bake fish for 20 minutes or until done.


 The salt's color turns dark when baked.


The salt crust hardens once it is done, so opening it is very dramatic! Use a knife to cut along the edges. Serve meat of fish with a light drizzle of extra virgin olive oil, pepper and some lemons if you want.
This was my first time and it was divine!!!


Sunday, May 19, 2013

#113 Spain's Pan de Leche


After I made bagels, there was no stopping my experiment with yeast. I have to admit, there were  3 packets of yeast that were dissolved in water and then poured down the drain because of my lack of know-how. The first packet was poured in the water that was too hot from the microwave oven, then the other 2  were discared also because I thought I did something wrong when I poured yeast in milk- it didn't foam. But I didn't give up. The next day, I bought another packets, and was more determined to make my favorite Filipino Pan de Leche. After proofing..which didn't foam much..I started mixing in a large bowl, and  kneaded it until smooth.Then I let it rise, it didn't double it's size..I know I did everything correctly, so I followed my gut and baked it anyway. I watched the bread with so much excitement, it's been at  least  18 months since I had it. After I took it out of the oven, I noticed the cracks, and I thought, well, maybe it is because I am baking at 5,800 ft above sea level, whereas the Philippines is at sea level. I tasted it, and it was very good and very sweet..but  was definitely not what I was looking for, it reminds me of a filipino bread  called Pantso.  Further investigation led me here, where the same recipe I used was adapted from. It states that it is a Spanish Sweet Milk Bread, not Filipino. I was relieved to see the similar cracks on the bread crust in their picture! Whew! In Spain, it is eaten for breakfast or "merienda" (afternoon snack). In the Philippines, we eat it mostly for merienda, but our Pan de Leche is very soft and fluffy, and it does not have cracks :) . I will be searching for the recipe and will share once I have successfully made it. This recipe is great, and I am happy to have discovered and made this bread. It's lovely!

Yield: 8 medium rolls

SPAIN'S PAN DE LECHE


Ingredients:

3 oz (100 ml) lukewarm milk
1 envelope (1/4 oz) dry yeast
1 egg
1/2 cube (50 gr) softened butter
1/3 cup (70 gr) granulated sugar
1 ½ cups (200 gr) unbleached white flour
2-3 Tbsp vegetable oil

Directions:
  1. Warm milk and pour into a glass measuring cup. Mix in the dried yeast until completely dissolved. Cover with a small kitchen towel and set in a warm place, away from drafts for 10 minutes.
  2. Cream butter and sugar in a medium size mixing bowl. Beat egg into the butter-sugar mixture. Add yeast-milk mixture and mix thoroughly.
  3. Add flour to mixing bowl, a 1/2 cup at a time. Mix in flour with a wooden spoon until dough forms a ball. If necessary, add additional flour 1 Tbsp at a time until soft dough is formed.
  4. Dust dough with 1 Tbsp flour. Cover bowl with a wet kitchen towel and place in a warm spot, away from drafts. Allow to rise for 30 minutes.
  5. After rising, dough will be soft, spongy and sticky. Coat hands with oil. Uncover and knead dough 5-6 times. Separate dough into 4 pieces. Form into balls or rectangles and place on cookie sheet or baking stone. Allow to rise for 15 minutes.
  6. Preheat oven to 400F . Bake bread for 7 minutes. Remove and brush bread with vegetable oil. Return to oven and continue to bake for 7-10 minutes. Remove when bread begins to brown. Allow to cool for 5 minutes, then serve with butter or jam.


My second bread made from scratch, we love it!


Tuesday, April 16, 2013

#59 Barbecue Chicken with honey sauce


Our second recipe for the grilling season. Chicken Barbecue with honey sauce. Chicken! I am always careful with handling chicken meat, especially grilling because unlike beef and seafood, it needs to be cooked thoroughly. It was a nice warm weekday evening, we had some fresh unfrozen chicken thighs in the fridge, and a massive craving for barbecue that instructed me to fire up the grill. We searched for a barbecue sauce recipe and we found one that had great reviews but needed so many ingredients. The most that I have ever seen..Really? Too much for a barbecue sauce! But I had to give this recipe a try. We needed it. No pain, no gain, I thought. Well, we certainly gained a delicious barbecue dinner for all the effort. :) Chicken was moist, loved the sauce! The recipe below is enough to use for basting, as a marinade and  for the dipping sauce for 3-4 pounds of chicken.


BARBECUE CHICKEN with HONEY SAUCE


Ingredients:

1 cup honey
3/4 cup brown sugar
1 cup ketchup
1/8 teaspoon ground cinnamon
1/2 teaspoon paprika
1/8 teaspoon ground ginger
1 tablespoon seasoned salt
1 tablespoon meat tenderizer
1/8 teaspoon ground black pepper
1/4 teaspoon salt
1/8 teaspoon dried oregano
1/4 teaspoon minced garlic
1/4 cup steak sauce
2 tablespoons Worcestershire sauce
1 tablespoon prepared mustard
finely chopped onions
3-4 pounds chicken


Directions:
  1. In a medium bowl, combine all ingredients. 
  2. Divide into 2 parts, for basting and for dipping. 
  3. Cover the one for dipping and refrigerate until ready to use.
  4. Grill chicken meat and baste frequently until meat is well cooked. 

Recipe adapted from Kimberly D., contributor at www.allrecipes.com


Most etymologists believe that barbecue derives from the word barabicu found in the language of the Taino people of the Carribean and the Timicua of Florida, and entered European languages in the form barbacoa.  The word translates as "sacred fire pit." The word describes a grill for cooking meat, consisting of a wooden platform resting on sticks.  (Source: http://en.wikipedia.org/wiki/Barbecue). 

I wanted to find out the history of honey barbecue sauce but couldn't find anything except an article that wrote about how the Koreans like to add honey in their barbecue sauces. There are many barbecue sauce recipes from all over the world. I'm excited to discover new ones to add to the remaining 306 dishes that we will prepare. It was also great learning a lot about honey- it's production, history and properties. A Mesolithic rock painting found in Valencia, Spain is an evidence that shows ancient honey collection atleast 8,000 years ago. Very interesting facts we read about honey that I never bothered to learn all this time, even though honey is added to my coffee every morning. Now we know more. We learn something new every day and we love it.


Monday, January 14, 2013

Vangria!!!


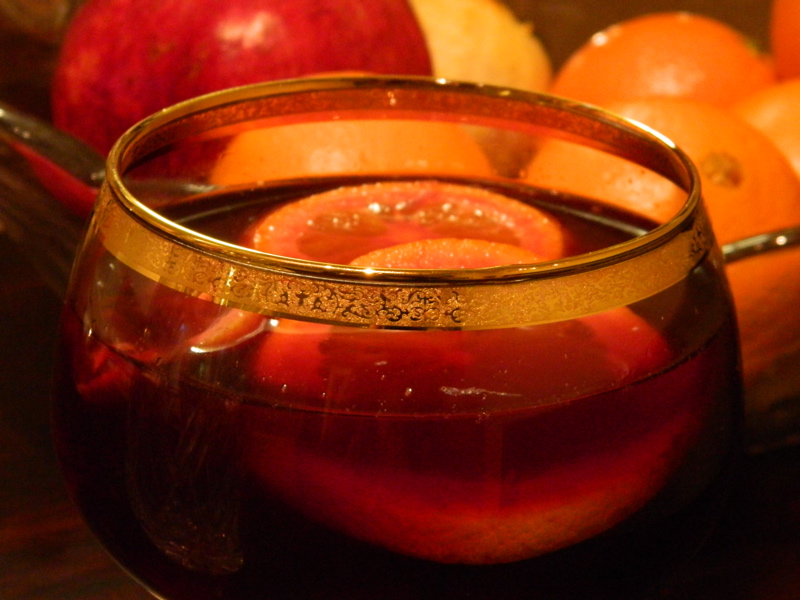
I thought I should share this recipe because I really liked it. If you are looking for a cheaper wine to make your own Sangria, this bottle of  Pinot Noir was on sale for $8.99, with fruity aromas and flavors, I thought it should taste good when mixed with other fruits. It sure did.


Van's Sangria
(Vangria)


Ingredients:

1 bottle of Mark West Pinot Noir
1 big navel orange with peel, sliced
Meat of 1 big navel orange, coarsely chopped
1 lemon with peel, sliced
1/2 cup halved sweet grapes
1/2 cup raspberries
1/2 cup strawberries
2 tablespoon sugar (add more according to your taste)
Some brandy (optional)


Directions:
  1. In a glass pitcher, pour in the wine.
  2. Squeeze the lemon and orange slices and toss in the slices.
  3. Add the brandy, fruits and sugar.
  4. Stir. Chill for at least 3 hours. Best when chilled overnight before consuming.

Red wine was first mixed with fruits in Andalusia, Spain as some historians speculated. This delicious drink is typically served in Spain and Portugal in the summer months in some areas, and year round in others. It is also commonly served in South America. Sangria, named after the Spanish word 'sangre' meaning blood for it's dark red color, is a favorite to many and widely served in bars and restaurants here in the United States, in UK and many other countries.

Now it's your turn to make it, add more variety of fruits that you love and enjoy it in the comforts of your own home, year round! :)