Showing posts with label *Vegetarian. Show all posts

Saturday, November 9, 2013

#151 Asian Eggplant Dip


Eggplant or also known an aubergine, brinjal, brinjal eggplant, melongene, garden egg or guinea squash. Wow, I didn't know this vegetable has so many different names! We call it talong in the Philippines. They come in different variety names, in different colors and can be cooked in many different ways. Back home, we throw it on a hot grill or steam it, and  then dip it in a mixture of soysauce, lemon, chopped green onions and crushed fresh hot chili pepper. A very simple poor man's meal. We also use it in stir fries and add it in soups as well. I didn't know of any other ways to cook it then. When I moved to the United States,  I was surprised to discover the many wonderful ways it can be enjoyed. Ratatouille, Parmigiana di melanzane,  Baba Ganoush, Moussaka, etc. So delicious!

I was craving for eggplants, so when I visited Ranch 99, which is an Asian grocery store, I picked up a couple of giant eggplants. Although there are many ways to enjoy it, I always go back to how we prepared it while I was growing up.  Good old grilling and making my spicy hot soy sauce dip. The taste always brings back great memories. 
Once I took it off the grill, I stared at it for a long time because it was then that I realize, I did not have green onions and soysauce. I ran out of soysauce! For the first time!  

Instead of grabbing my key to drive to the nearest grocery store, I  started searching for baba ganoush recipe, I quickly found it and learned that it is easy to make IF I had tahini, which is the major ingredient. :/ I searched the fridge to see what I had, and found lemon, ginger and garlic. I quickly peeled and  minced the garlic and ginger, I knew in my heart that the mix of flavors will work! No need for me to rush to the grocery store! I then scraped the meat of the grilled eggplant and mixed all other ingredients with it in a bowl, squeezed in the fresh lemon juice, and then added the salt to taste. What would I do with out salt? :) Next, I added ground pepper.. Yum! Then, I sprinkled red pepper flakes, mixed it all good, and a great asian flavor inspired dip is created!
It was a great dish to enjoy with left over crackers and that smoked salmon that I picked up from Trader Joes that's been in the fridge for a while.
Ready to make yours? Here's how:
ASIAN EGGPLANT DIP
Ingredients:
2 large eggplants, halved, grilled until soft
2 cloves of garlic, minced
1 root ginger, peeled and minced
1 lemon
salt and pepper to taste
red pepper flakes to taste
smoked salmon, optional
crackers
chips 
Directions:
  1. Scrape the meat off the grilled eggplant using a fork.
  2. In a bowl, mix the eggplants, minced garlic, minced ginger, lemon, salt, mix well.
  3. Add pepper and red pepper flakes to taste.


Enjoy!

Wednesday, June 19, 2013

#145 Horiatiki Salata (Greek Salad)


With no lettuce nor other leafy greens and using only fresh plump tomatoes and other equally fresh, crunchy vegetables, kalamata olives, a simple vinaigrette, and sprinkled with feta cheese before serving,  this recipe makes a simply delicious Horiatiki Salata or Greek salad. Horiatiki means village-style. This is how I ate salad back home in the Philippines since we did not have an abundance of lettuce, but without the olive oil and cheese. After I tried this for the first time, I fell in love with it and now  Greek Salad is a must have at least once a week for me. It's one of my favorites.  I did not remove the cucumber seeds as per instructions, because for some odd reason, I cannot eat cucumbers without the middle part, it ruins the taste for me. I also added radish because I like it very much, adding radish to Greek salad was introduced to me by a former co-worker of mine, who always shared her Greek Salad with everybody every single day, and it was always delicious. Simple, flavorful and filling..top with feta cheese, it's heaven!
Yield: Serves 6
HORIATIKI SALATA (GREEK SALAD)

Ingredients:
1 hothouse cucumber, unpeeled, seeded, and sliced 1/4-inch thick
1 red bell pepper, large-diced
1 yellow bell pepper, large-diced
1 bunch of radish, peeled and halved,  or cut smaller if you like
1 pint fresh cherry or grape tomatoes, halved
1/2 red onion, sliced in half-rounds
1/2 pound feta cheese, 1/2-inch diced
1/2 cup kalamata olives, pitted

For the vinaigrette:

2 cloves garlic, minced
1 teaspoon dried oregano
1/2 teaspoon Dijon mustard
1/4 cup good red wine vinegar
1 teaspoon kosher salt
1/2 teaspoon freshly ground black pepper
1/2 cup good olive oil

Directions:
  1. Place the cucumber, peppers, tomatoes and red onion in a large bowl.
  2. For the vinaigrette, whisk together the garlic, oregano, mustard, vinegar, salt and pepper in a small bowl. Still whisking, slowly add the olive oil to make an emulsion. Pour the vinaigrette over the vegetables. 
  3. Add the feta and olives and toss lightly. Set aside for 30 minutes to allow the flavors to blend. Serve at room temperature.
Recipe adapted from Ina Garten's Greek Salad here


I omitted the onions, but I highly recommend not to, because onions add a great flavor to it. 
It's your personal call. It's yummy either way. :)


Tuesday, June 11, 2013

#139 Moroccan Rice


I love rice especially steamed white rice. Before I started this cooking blog, I ate it night and day all year, 365 days of white rice. Now I am more open to eating spiced rice, pasta, breads, other grains and  even go zero carbs for most meals, and I love it! This dish sparked my curiosity in mixing rice with  spices used in Moroccan cuisine because I made Moroccan beef stew that night and did not have the suggested accompaniment on hand, the couscous. So I quickly searched for Moroccan Rice or Bread. I always have rice, and bread takes a while to make, so of course making a delicious rice dish, flavored with fragrant ground spices was a better idea. Although it was very tempting to just plainly steam it, I'm glad I did not succumb to laziness because, this dish is very good! It actually reminds me of  the rice my late grandma use to make on special occasions back in the days, it was yellow and flavorful. A quick look at the bottle of ground turmeric showed a root that looked like ginger. I do not remember what they called the yellow rice dish and was not 100% sure what Ina (what I called my Grandma) and Babo (my other Grandma) used to make it, but after seeing that photograph on the ground turmeric bottle and tasting this dish,  I am pretty sure it was fresh turmeric. :) So we do grow turmeric in the Philippines! Good to know! It is what gave this dish it's nice yellow color. The taste overall is lovely, the raisins bring a pleasant sweetness to the dish, and thumbs-up to the flavor created by the lemon and spices combined. I also used sona masoori rice that I got from costco, which was not tasty when plainly steamed, but it was great for this dish, I read from several sources that it is better than Basmati rice for weight loss. This recipe also calls for almond and pine nuts which I omitted due to our allergies, but even without, it tasted great! When I served it, I forgot to add the cilantro leaves on top, it was tasty, but there was something missing..once I sprinkled  the magical tiny leaves and some of it's stems, what a world of difference it made.  This dish promises big on flavor, so easy to make, so delicious that I can eat by itself,  and yes, it did go well with the stew, it was a perfect marriage of flavors! I'm sure this would be an excellent accompaniment to grilled meats also. I am posting two ways to cook it, one on the stove top, which is how I made it, and one using the microwave oven adapted from this recipe.
Yield: 4 servings 
MOROCCAN RICE
Ingredients:
200 g basmati rice or sona masoori rice
500 -750 ml chicken stock
2 tablespoons olive oil
1 yellow onion, halved and finely chopped
65 g slivered almonds
80 g pine nuts, chopped
1/2 teaspoon ground cumin
1/4 teaspoon ground turmeric
1/4 teaspoon ground cinnamon
1 pinch chili powder (to your taste)
65 g raisins
1 lemon, rind cut into very thin strips, juiced
1/3 cup loosely packed coarsely chopped fresh cilantro
salt  and fresh ground pepper, to taste

Directions:

(stove top)
  1.  Rinse rice under cold water until water runs clear; drain.
  2. Place rice in a pan.
  3. Add enough stock until it covers the rice by 2cm, add oil.
  4. Cover with a lid and boil, then simmer until rice is soft, adding more stock when needed. Rice must not dry up.
  5. Once rice is almost done, add onion,  cumin, turmeric, cinnamon and chili powder
  6. In a separate pan, heat a little bit of olive oil, add the almonds and pine nuts, add to the rice mixture, stir in lemon peel slices and raisins.
  7. Lower the heat, stir the rice every minute until rice is done. Serve with chopped fresh cilantro sprinkled on top. Salt and pepper to taste.
(microwave oven)
  1. Rinse rice under cold water until water runs clear; drain.
  2. Place rice in a microwave-safe rice cooker or bowl.
  3. Add enough stock until it covers the rice by 2cm.
  4. Cover with a lid or a double layer of plastic wrap and Cook on High/800watts/100% for 5 minutes.
  5. Cook on Medium/500watts/50% for a further 7 minutes.
  6. Remove from microwave and set aside.
  7. Meanwhile place oil, onion, almonds, pine nuts, raisins, lemon peel cumin, turmeric, cinnamon and chili powder in a microwave safe rice cooker or bowl.
  8. Cook uncovered stirring every minute on High for 3 to 4 minutes or until the nuts are toasted and the mixture is fragrant. Serve with chopped fresh cilantro sprinkled on top. Salt and pepper to taste.


Yummy! What a great discovery!

Sunday, June 9, 2013

#137 Irish Potato and Parsley Soup


I discovered a green soup, that's also Irish, so perfect for St. Patrick's Day next year! :) I love this soup. I just happened to have so much Parsley and a quick search for "parsley soups" led me to the discovery of this delicious recipe, which I tweaked a little bit. What I love about it? It is very simple, it requires a blender after cooking to liquefy the potatoes, so the soup comes out really smooth and filling as well. Parsley is very inexpensive and has a unique delicious taste, it's nutritious and it comes in bunches when you buy it; since I love it's flavor, I used A LOT of fresh parsley for this traditional Irish soup. It is usually added with bacon, potatoes, milk, cream and chicken stock. I omitted the bacon, it still came out so tasty. What I learned about blending soups that just came out of the stove top? DO NOT fill the blender, or it will overflow, and hold the lid down very firmly! The heat of the soup creates a steam that will send the blender's lid to the ceiling and will paint it green! Best to cool it a little bit before blending, or add soup half a blender at a time.

Yield: Serves 4

IRISH POTATO and PARSLEY SOUP

Ingredients:

2 tablespoons Irish butter
2 cloves of garlic, minced
1 large onion, chopped
3 potatoes, washed, peeled and chopped
2 cups chicken broth, OR 2 teaspoons chicken base + 2 cups water
2 cups of milk
3 cups of chopped fresh parsley
1 cup of chopped fresh celery
salt and pepper to taste
cream

Directions:
  1. In a large pot, heat butter and then add onions, and then garlic, don't let it brown.
  2. Add potatoes, cover to let it cook, don't let it burn.
  3. Add broth, parsley and celery, and then let it boil once then reduce heat. Add milk and let it simmer for 5 minutes.
  4. Then, add soup in a blender to liquefy. It is best  (based on my experience!) to do it half a blender at a time.
  5. Return the blended soup in the pot, simmer for another 5 minutes.
  6. Salt and pepper to taste, serve with cream on top.


Delicious Irish Potato and Parsley Soup


Saturday, June 8, 2013

#136 Mung Bean and Spinach Soup


I ate a lot of Mung beans growing up in the Philippines, we call this dish  Ginisang Monggo or Munggus (Mung Bean Soup), it is cooked with vegetables like malunggay, yellow squash, bittermelon and  meat or dried fish. Here in the US, I learned how to make and  eat it with just very few vegetables and I like it better. The flavor of the Mung  bean is delicious enough, it is high in protein and so I feel that adding meat is unnecessary. I make this simple dish with just garlic, onions and spinach. Very simple yet delicious and highly nutritious! 
Yield: Serves 6 or more
MUNG BEAN and SPINACH SOUP
Ingredients: 

3 cups of Mung Beans
6 cups of water, or more
2 tablespoons olive oil
3 cloves of garlic, minced
1 stalk green onions, chopped
1/2 tsp ginger powder
3 cups of chopped fresh spinach leaves
2 teaspoons vegetable or chicken base
salt and pepper to taste

Directions:
  1. Boil and then simmer 3 cups of Mung beans in six cups of water, adding more water when needed until cooked. Cooked mung beans will crack and has a soft texture. (see pic below) It should absorb most of the water when cooked, make sure you turn the heat off as soon as it is done.
  2. In a separate large saucepan, heat olive oil, then add garlic until brown, add onions.
  3. Add the cooked beans (undrained).  Add the vegetable base, ginger powder and let it boil at once. Reduce heat, stir in the spinach, until it is well mixed in with the beans. Turn the heat off and cover.
  4. Serve warm, salt and pepper to taste.


The mung or moong bean (also known as green gram or golden gram or pesalu in Telugu) is the seed of Vigna radiata, has been grown in India since the ancient times, and mainly cultivated in India, China, Thailand, Philippines, Indonesia, Burma, Bangladesh, Laos and Cambodia, but also in hot and dry regions of Australia, Africa and Southern America. Mung beans are commonly used in Chinese cuisine, as well as in the cuisines of Burma, Sri Lanka, Cambodia, Thailand, Japan, Taiwan, Korea, Philippines, Bangladesh, India, Pakistan, Iran, Iraq, Indonesia, Nepal, Vietnam, and other parts of Southeast Asia. Read more about Mung beans from Wikipedia
How healthy is Mung Bean? It is very low in fat, high in dietary fibers, protein, iron and magnesium. It also contains vitamin C, calcium and vitamin B6. This is why it is one of my favorite foods. It can be used for desserts too! Will post a sweet dish made of Mung bean soon.


This super healthy dish made of mung beans, spinach, olive oil and garlic. Delicious too!


Saturday, June 1, 2013

#131 Baked Falafel


After I successfully made the pita bread, I immediately looked for falafel recipes. Falafel is a traditional Arab food, it is a deep fried ball or patty made from ground chickpeas, fava beans or both, ground fresh parsley, garlic, onion and spices. Believed to have originated in Egypt, first made by the Copts as a replacement for meat during lent, it has spread all over the middle east as street food and around the world. I learned also that in some countries, McDonald's serve "McFalafel". :) I first tried this dish 3 years ago  and it was absolutely divine! And because I have that memory, my expectations were high on this one. I was getting ready to fry it but I found a good recipe for baked falafels. I decided to try the baked ones out of curiosity and to cut on the fats.


And it turned out great! At first I was a little worried because the mixture was too runny, but then it hardened perfectly in the oven.  I made the patties too thin I guess, but the flavors were all there, very very delicious!

Yield: Serves 2-4

BAKED FALAFEL
 
Ingredients:

1/4 cup chopped onion
1 (15 ounce) can garbanzo beans, rinsed
and drained
1/4 cup chopped fresh parsley
3 cloves garlic, minced
1 teaspoon ground cumin
1/4 teaspoon ground coriander
1/4 teaspoon salt
1/4 teaspoon baking soda
1 tablespoon all-purpose flour
1 egg, beaten
2 teaspoons olive oil
Directions:
  1. Wrap onion in cheese cloth and squeeze out as much moisture as possible. Set aside. Place garbanzo beans, parsley, garlic, cumin, coriander, salt, and baking soda in a food processor. Process until the mixture is coarsely pureed. Mix garbanzo bean mixture and onion together in a bowl. Stir in the flour and egg. Shape mixture into four large patties and let stand for 15 minutes.
  2. Preheat an oven to 400 degrees F (200 degrees C).
  3. Heat olive oil in a large, oven-safe skillet over medium-high heat. Place the patties in the skillet; cook until golden brown, about 3 minutes on each side.
  4. Transfer skillet to the preheated oven and bake until heated through, about 10 minutes.
Recipe adapted from here


Yes, I will make it again. :)
So yummy!


Thursday, May 23, 2013

#127 Roasted Artichokes

It is also called globe artichoke, green artichoke or French artichoke; the ones pictured above are the  buds of the plant that  grows as high as 6.6 feet tall; these buds are picked before the flowers bloom and become inedible. Believed to be a native to the Mediterranean and Canary Islands, it is now largely cultivated in Italy, the world's biggest producer. In the United States, 100% of crops are grown here in California, 80% comes from the city of Castroville in Monterey county, the self-proclaimed "Artichoke Center of the World", which holds an annual  Castroville Artichoke Festival . I bought, cleaned and cooked fresh artichokes for the first time last week. It took a little bit more of work than I expected. Artichoke is a unique vegetable, both in looks and texture...and  some are extremely thorny! It pricked me the first time I held it...I didn't know it had sharp thorns on the tip of the leaves! I read somewhere that once cooked, the thorns will soften and are harmless...uh, after that sharp pain at the grocery store.. No, the thorns needed to go.

 I snipped the outer layers using a pair of scissors, 
and then removed the thorns by cutting the tips with a sharp knife.


             Then, I cut it into halves.


I soaked the artichokes in water mixed with the juice of two lemons, and after a few minutes, I drained  and pat it dry. Arranged on a greased baking sheet, I drizzled some olive oil, and seasoned it with salt and pepper. Then I roasted it in 425 F degrees, turning every 10  minutes, until tender.


Roasted artichokes  with Greek Yogurt Aoili. It tasted good. I learned that artichokes are very nutritious and have medicinal benefits as well. Studies have found this  vegetable to diminish the risk for arteriosclerosis and coronary heart disease by lowering cholesterol levels; it aids in digestion, hepatic and gall bladder function and it has also proved helpful for patients with functional dyspepsia, and may ameliorate symptoms of irritable bowel syndrome. The artichoke  leaves are  a great addition to our diet because according to a study done by the USDA, artichokes have more antioxidants than any other vegetable, it is high in fiber, good for the liver, etc. But I must admit that I like the taste of jarred marinated artichoke hearts better. I will search for other ways to cook it, hoping that my next experience with fresh artichokes  will change my opinion of it. Any suggestions?

#125 Greek Yogurt Dijon Aoili


Aoili is  a Provençal traditional sauce sauce or dip. If a quick preparation is desired,  most recipes commonly use mayonnaise, because it is mayonnaise-like; to make it from scratch, garlic paste, a good amount of olive oil, lemon and egg yolks are required . We completely removed mayonnaise from our diet a long time ago, and I didn't want to put too much oil in our food that night so I looked for a substitute; my guess was right, to make a healthier aoili,   fat-free greek yogurt can be used.  I found a recipe that uses dijon mustard, which I love, so I chose it as our dip for our roasted Artichokes. It  tastes great less the fat. :)

GREEK YOGURT GARLIC & DIJON AOILI

Ingredients:

1/4 cup fat-free greek yogurt
1/2 teaspoon dijon mustard
1/4 teaspoon minced garlic

Directions:
  1. Mix all the ingredients and let stand for 1 hour before serving.


#123 Gnocchi in butter sage sauce


We made potato Gnocchi from scratch, and we learned that one of the best sauces to flavor the normally bland Gnocchi, is a simple sauce made with butter and sage. Luckily, I had fresh sage leaves, and so I used that instead of the dried variety. I pan fried the Gnocchi in butter until they are slightly brown. Depending on how you made it, sometimes Gnocchi can be really soft when heated again. So even if it was very tempting to stir it, I didn't until they are browned and firm enough again to retain it's shape. Then  I seasoned it and sprinkled thinly sliced fresh sage leaves. Delicious!

GNOCCHI IN BUTTER SAGE SAUCE

Ingredients:

Gnocchi recipe here
2-3 tablespoons of butter
1 clove of garlic, minced
salt 
pepper
fresh sage leaves, thinly sliced
grated parmesan cheese


Directions:
  1. In a pan, melt the butter, add the gnocchi, flip only once when they are slightly browned.
  2. Once the gnocchi are slightly browned on all sides, add the garlic, salt, pepper, parmesan cheese.
  3. Add more butter is desired. Sprinkle fresh sage leaves before serving.


Wednesday, May 22, 2013

#121 Basic Potato Gnocchi


I don't remember trying this pasta ever. It looked very good and fancy in the photos, so it was about time to try and also learn how to make it. Gnocchi is an Italian thick and soft dumpling, of probable Middle Eastern origin since the Roman times. READ MORE HERE It is a traditional pasta eaten as a first course (primi piatto).  This recipe is of  basic potato Gnocchi,  you can also use white flour, semolina, wheat flour to make it and then add ricotta cheese, fresh herbs and spinach if you like. Once made, add sauces to flavor. I used two large russet potatoes for this recipe, it was super easy to make!

BASIC POTATO GNOCCHI

Ingredients:

2 russet potatoes
2 cups of flour
1 egg

Directions:
  1. Bring a large pot of salted water to a boil. Peel potatoes and add to pot. Cook until tender but still firm, about 15 minutes. Drain, cool and mash with a fork or potato masher.
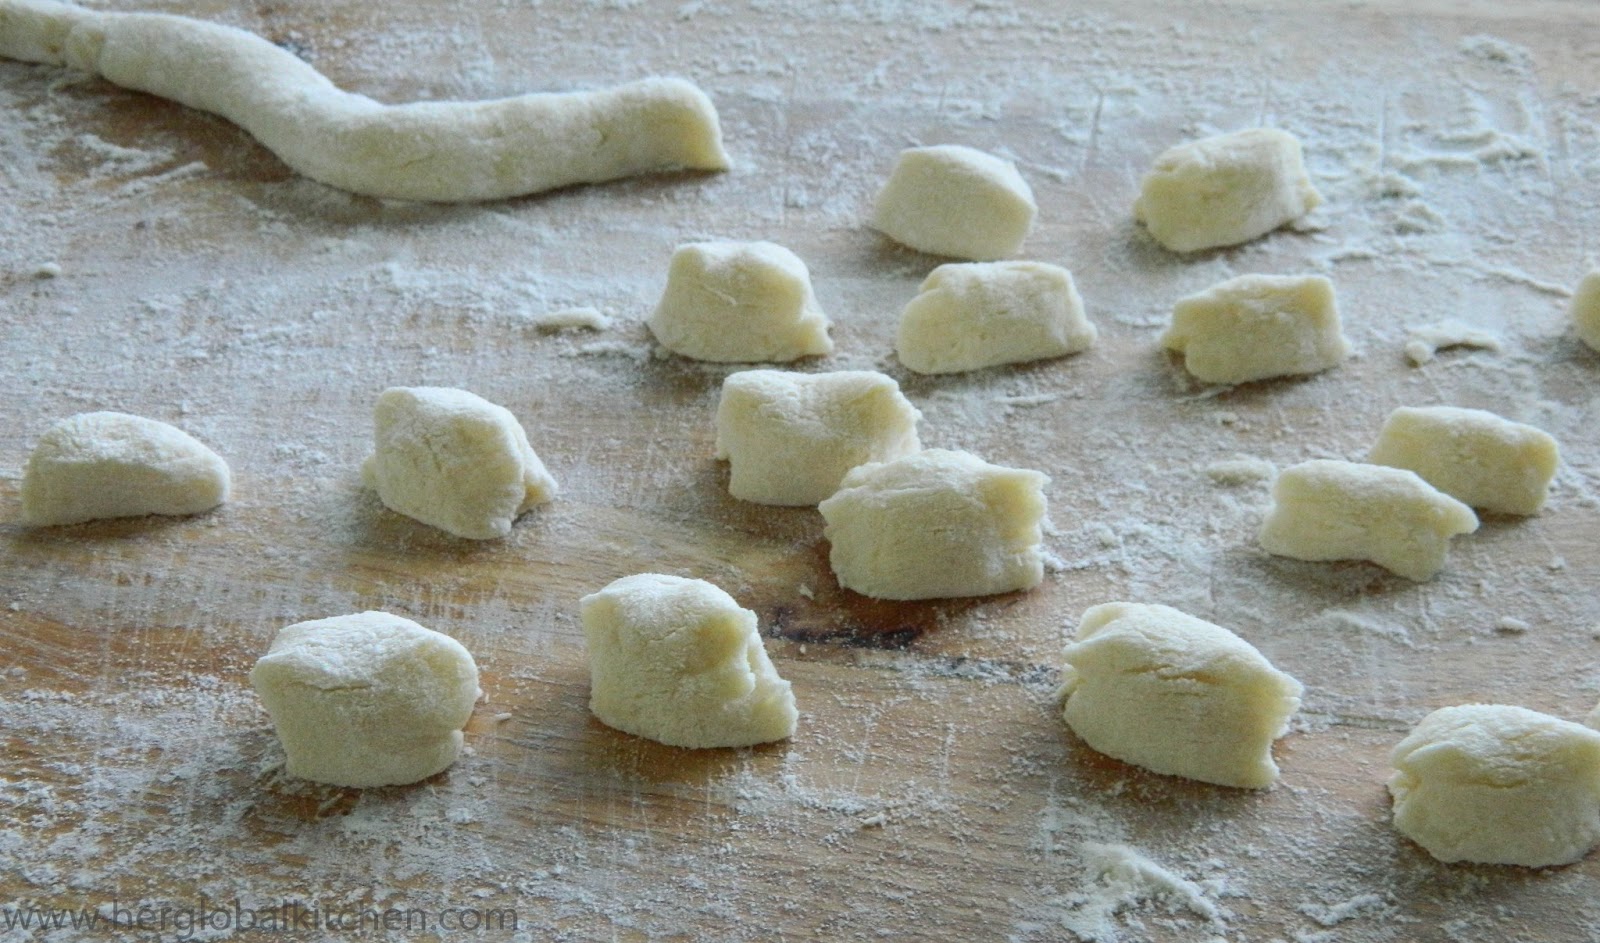
  2. Combine 1 cup mashed potato, flour and egg in a large bowl. Knead until dough forms a ball. Shape small portions of the dough into long "snakes". On a floured surface, cut snakes into half-inch pieces.
  3. Bring a large pot of lightly salted water to a boil. Drop in gnocchi and cook for 3 to 5 minutes or until gnocchi have risen to the top; drain and serve.
Recipe adapted from here


Very fun and delicious!

#117 Baked Spinach Wonton Crisp


I had so much of spinach left in the fridge and I did not want to waste it nor freeze it  yet without using atleast half of it, so a quick search online led me to spinach wraps recipes. I found a great recipe but had one problem, I had no phyllo sheets and did not want to drive a total of 45 minutes just to get it from the store. However, I had a pack of  unopened wonton wrappers and found out that I can use it too, and then bake it. It came out really crisp and delicious. This will make a great appetizer dish, and the amounts in this recipe is great for entertaining.
Yield: Serves 10 or more
BAKED SPINACH WONTON CRISP

Ingredients:

2 cloves garlic, crushed
olive oil
2 bags baby spinach, cleaned
salt
1/4 cup ricotta cheese
1/4 cup neufchâtel cheese
1 tablespoon fresh basil, chopped
½ tablespoon fresh mint, chopped
sundried tomatoes, chopped
pepper
1 package square or round Wonton wrappers
Olive oil spray


 Directions:

  1. Sauté garlic in a small amount of olive oil. Add spinach and salt (to taste) and cook until spinach is wilted. Drain well, squeeze out water then let cool.
  2. Add ricotta, basil, mint, sundried tomatoes and pepper to spinach mixture and mix well.
  3. Lay out one wonton wrapper, keeping the rest covered with a damp cloth so they do not dry out. In the center of the wrapper, place  ½ tablespoon of spinach mixture. Spread water over the edges of the wrapper and fold into a triangle. Ensure that edges are tightly sealed by pressing down with a fork.
  4. To bake: Preheat oven to 400 degrees. Lay out wontons on a baking tray, and coat with olive oil spray. Bake for 15 minutes, turn over and bake for another 10 minutes, until crisp. 

Recipe adapted from here


Fun dish, this is one of my new to go snack/appetizer, and a great way to use up spinach before they go bad.

Tuesday, May 21, 2013

#115 One night, five different vegetable pizzas


Once you learn how to make your own pizza dough from scratch, the possibilities are endless. For very little cost, you can make any pizza that you want, even five different ones in one night! It's very quick and easy to do, even for a new baker like me.  Pizza dough keeps well in the fridge,  we had some uncooked dough that was a few days old so I decided  to experiment with different vegetables on mini pizza crusts,  the best tasting one will be made into a large pizza on the next pizza night. So I gathered all the vegetables that I had in the fridge, spinach, cherry tomatoes, arugula, onions, garlic, mushrooms and bell peppers. I also had some fresh and shredded mozarella cheese from the previous weekend, so I cut it into small slices and then joyfully worked on the dough- flattening and forming it is our favorite portion in the whole pizza making.
For our pizza dough, we used this recipe
FOR THE PIZZA SAUCE:

Ingredients:

8 ounces organic tomato sauce
24 pieces of sugar plum tomatoes (or cherry tomatoes)
4 pieces of large fresh basil leaves
6 pieces of fresh oregano leaves
1 small onion
1 small garlic clove
2 pieces of mint
1 tablespoon water
3 pieces of brown mushrooms
salt and pepper to taste
Directions: 
  1. In a food processor, blend sauce recipes until smooth, best if made in advance and chilled for 1 hour.
 
Pizza #1:
Pizza dough, pizza sauce, fresh mozzarella cheese. Sprinkled with fresh baby spinach leaves and fresh basil before serving.


Pizza #2:
Pizza dough, pizza sauce, fresh mozzarella cheese, fresh halved cherry tomatoes. Sprinkled with fresh basil on top before serving.


Pizza #3:

Pizza dough, pizza sauce, fresh mozzarella cheese, red onions, sliced olives and marinated artichokes.


Pizza #4:

Pizza dough, pizza sauce, fresh mozzarella cheese, sautéed garlic, red bell peppers, then topped with sliced fresh basil.


Pizza #5:

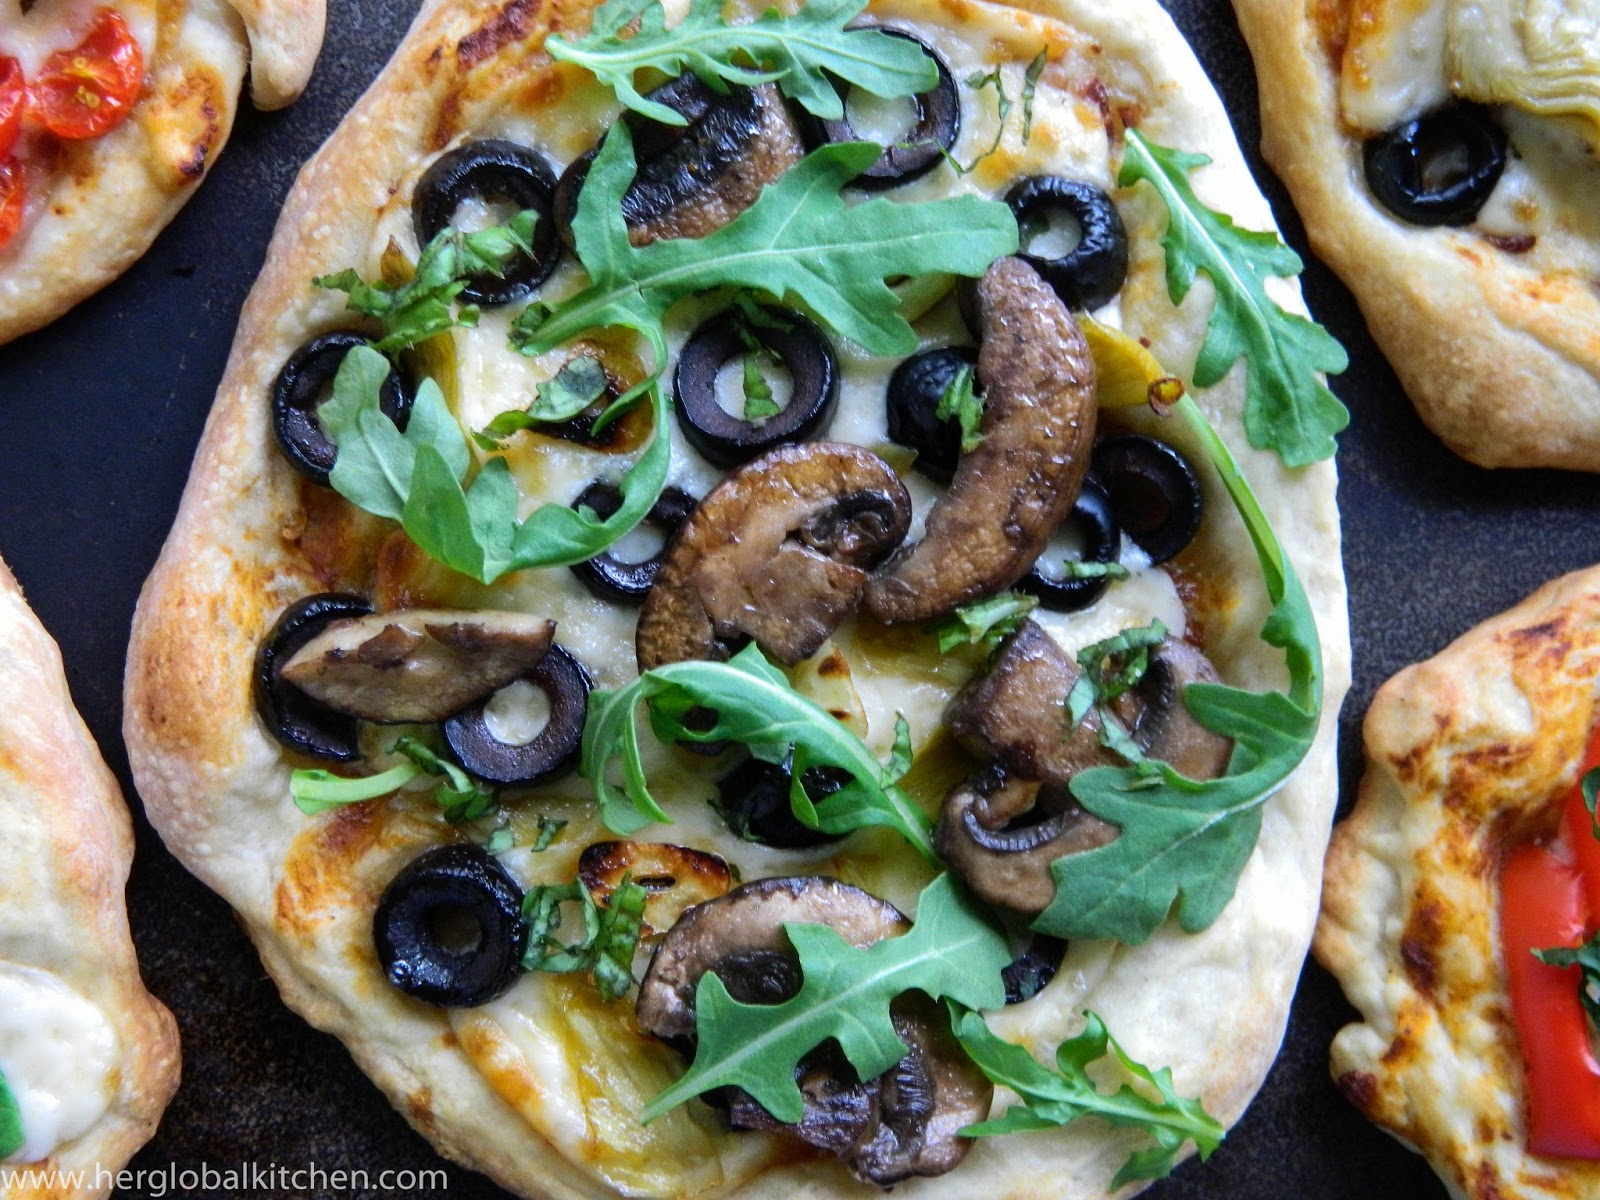
Pizza dough, pizza sauce, fresh mozzarella cheese, sautéed garlic, sautéed mushrooms in olive oil seasoned with salt and pepper, olives, artichokes, then topped with sliced fresh basil and arugula  before serving.

So, which one won? Hmm.. I love all of the above! While it is simpler to just mix all the vegetables  in one big crust, this was fun to make and eat. The smallest pizza in the group was big enough to divide into 3 slices, so it was really fun to have small sizes of 5 different kinds of vegetable pizza. All five won, so there will soon be another mini pizza night, I'll make it exactly like this but will most probably add more mini crusts topped with grilled meats and pineapples. :)

Wednesday, May 15, 2013

#107 Gurkensalat mit Dill


Gurkensalat mit Dill, is a German dish that caught my attention because it has cucumbers, and it looks so beautiful. It translates to Cucumber and Dill Salad. I had so much fresh dill in the fridge, I learned how to use and started falling for  this fragrant herb shortly after I started this blog, so I always have it since then. Every time I eat it, it just hits me deep and  my taste buds only send the signal: "SO GOOD" to my brain. It took me 3 decades and more to discover the magic of fresh dill and other herbs. What took me so long?!, right? :) Now, I honestly prefer using fresh herbs over dried ones. Speaking of freshness, of all vegetables, cucumbers are the most refreshing. I love, love it! I've never tried cutting them paper thin before, and I do not own any special gadget to help me, so I had to use my own sharp knife to cut it as thin as possible. I loved the flavor, I used a fat-free sour cream, and dijon mustard; it's a great new healthy salad discovery for us! See,  I am slowly disproving the misconception that Germans only eat sausages, sauerkraut and drink only beer. Very wrong. They eat GOOD FOOD, and I personally love their dishes. This is one of the salads that they enjoy and now I do too, very much.

Yield: Serves 4

GURKENSALAT MIT DILL


Ingredients:

1/2 cup fat free sour cream
3 tablespoons wine vinegar
1/2 teaspoon dijon mustard
salt
white pepper
1/4 teaspoon sugar
1/8 teaspoon Worcestershire sauce
2 cucumbers, chilled, peeled and sliced very thinly (using a food processor, mandoline or knife)
1 small onion, sliced (optional)
3 tablespoons finely chopped fresh dill


Directions:
  1. In a medium bowl, combine first 7 ingredients. Mix well.
  2. Add the cucumbers and onion. Toss to coat lightly.
  3. Sprinkle with fresh dill. Serve immediately.


Smile, pretty salad.


Sunday, May 12, 2013

#104 Mother's Day weekend, Serving 10 and the much beloved Pizza Magherita


This weekend, I had a taste of how busy it is to run a bed & breakfast place. Haha! We had guests over, (Yay!) well, actually they were my good friend's guests, and we all kind of stuck together from Friday to Saturday. Very fun and chill. It was a great weekend spent with amazing and genuinely nice people who carry funny and very intelligent conversations, wear smiles- all the time, love laughter, love good food and love planet/star gazing. We brought the massive telescope out, and I saw the moon, Jupiter and it's moons, Saturn and it's rings and a few bright stars, all in one night..which I was told was rare. Cool stuff!  I also had the pleasure of making breakfast and lunch, for...10 people, who know a lot about good food. Taking on the big responsibility of being an instant chef for a day is a remarkable experience for a neophyte food blogger like me, did I say yes to it because of the blog? Well, yes- it was definitely something to write about and cherish for many years to come, but I mostly did it  out of love for  friends; it was really fun cooking, but mind you, it was very, very nerve wracking around 15 minutes before serving.. It's been ages since I cooked for more than 4! Although I was on the brink of a major panic attack making 5 different breakfast dishes: pancakes, eggs, sausages, bacon and hashbrowns and preparing the table with breads, fruits and yogurt and all others in 1 hour, I kept smiling because I already said early on that I did not want help!..haha..to my relief, everything went fine for breakfast. I used our pancake recipe, but added whole eggs, and everyone loved it! There was nothing on the breakfast menu that I want to write about because the dishes were very simple, so I will only post 3 dishes that we enjoyed for lunch and dinner this weekend. First off is Pizza, we served several with a variety of toppings, but the recipe that I will share is the one that everyone went gaga over. We made our own tomato sauce to use for our Pizza Magherita. A variation  of pizza that uses only tomato sauce and cheese. You can add any topping that you want, but I learned that making a good sauce and simply adding fresh basil leaves is more than what you need for a satisfying pizza. The fresh mozzarella cheese tastes very different from the shredded ones. Absolutely delicious! This is by far the best one I made to date, and the pizza dough that we used is perfect. You  can keep left overs for two days in the fridge, and it was still be tasty and the dough will be soft but not mushy. I was worried that we went overboard with the pizza sauce, but no, its a really great tasting sauce. We used sugar plum tomatoes that we got from Trader Joe's,  some fresh herbs and lots of love to make this fantastic Pizza Magherita.

PIZZA MAGHERITA

Ingredients:

Pizza Dough, recipe here
Fresh Mozarella cheese, sliced
Sugar Plum tomatoes, or cherry tomatoes, halved
Fresh Basil


FOR THE PIZZA SAUCE:

Ingredients:

8 ounces organic tomato sauce
24 pieces of sugar plum tomatoes (or cherry tomatoes)
4 pieces of large fresh basil leaves
6 pieces of fresh oregano leaves
1 small onion
1 small garlic clove
2 pieces of mint
1 tablespoon water
3 pieces of brown mushrooms
salt and pepper to taste


Directions:
  1. Preheat oven to 500 F degrees.
  2. In a food processor, blend sauce recipes until smooth, best if made in advance and chilled for 1 hour.
  3. Form pizza dough into a circle, then spread a thin layer of the tomato pizza sauce.
  4. Top with sliced fresh mozzarella cheese and halved sugar plum tomatoes. (you can use cherry tomatoes too)
  5. Bake for 10-15 minutes.
  6. Scatter fresh basil leaves over your freshly baked pizza.


Looks like Christmas, in the Spring. It really felt like it was Christmas time, it felt like I'm home with family being with these amazing people. There was Bob who said, "you're in the family now".  And there's the lovely ladies who said, "thank you, it was delicious" a million times. And then there's also the gentlemen who uttered the word "fantastic, outstanding, thank you" so many times. I heard and saw so much love and so much kindness  not just towards me, but towards everybody in a span of 6 hours, and more during dinner. Lunch ended with hugs. Simple things like kind words, touch and smiles can truly move hearts, it was a Saturday morning well-spent, indeed. :)


Happy Mother's Day to all Moms especially to my beautiful mother! 
It was one of the best Mother's Day weekend, what would have made it perfect is if I had my entire family together. Next Mother's Day will be the best one ever!