Friday, May 31, 2013

#128 Cocoa Mochi


While at the grocery store heading towards the dairy section to pick up milk, I noticed a box of sweet rice flour, the price was half off; I never fail to notice a discounted price at  grocery stores even if I am walking really fast, those yellow and red labels are just so hard to miss! :)  And don't we all get distracted at the grocery store and end up buying what wasn't planned? And that's what, as always, happened to me. So I picked up this small white box with a blue star and read the package. I haven't bought rice flour ever but  a former neighbor bought me a bag like 5 years ago. It was never used. I was going to put it back into the shelf but then I realized this was a different rice flour: it's a "sweet rice flour" and then I saw a recipe printed on it's box: Cocoa Mochi. A Japanese rice cake dessert,  it is a traditional food eaten on Japanese New Years' day. I remembered buying mochi ice cream at Trader Joe's a while ago and it was chewy, sweet, a delight! That memory convinced me to make mochi for dessert. For less than a dollar, I thought why not...I bought the 1 pound box of Koda Farm's Mochiko Sweet Rice Flour and immediately started making it when we got home. I read the directions and it looked pretty easy, it can be made in the microwave oven, shouldn't be that hard, right? I was excited. Mixing it with the water and sugar was a breeze, it dissolved easily. Then came the cooking part. One thing that  I did not like: once the rice flour is cooked, it sticks everywhere! The moulding requires a lot of patience, before I worked on the shape, I made sure my hands were wet, this trick by the way will save you  all the frustration in making a decent looking sticky mochi. How the talented home cooks make it so fabulous looking, you know, perfectly round, with ice cream inside, by hand.. is beyond me. This recipe calls for cocoa for dusting ( to prevent it from sticking). But if you want to add food coloring, a few drops will give it a nice pastel color, and then you can skip the cocoa powder for dusting and  use potato starch or powdered sugar instead.

COCOA MOCHI (Easy Microwave Version)

Ingredients: 
2 tbs unsweetened cocoa powder
2 cups sugar
1 cup water
1 box  Mochiko Blue Star Brand Sweet Rice Flour
3 cups water
extra cocoa powder for dusting

Directions:
  1. In medium saucepan, using a whisk, combine sugar and cocoa together very thoroughly. Then add 1 cup water and mix well. Heat syrup over medium high, stirring until sugar is dissolved. Set aside.
  2. Using a whisk, thoughly mix flour and 3 cups water in a large microwavable bowl until smooth. Cover and microwave 5 minutes on high. Remove from oven and using a large spoon, mix thoroughly. Return to oven, uncovered, and cook an additional 5 minutes on high.
  3. Remove from oven. Add cocoa syrup and mix thoroughly.
  4. Pour mixture into a 9 x 13 inch nonstick baking pan lightly coated with nonstick cooking spray. Let mochi cool overnight or until firm.
  5. Dust top with cocoa powder and invert contents onto a cutting board dusted with cocoa powder (before inverting pan, gently pull the mochi along the pan sides free).
  6. Cut mochi into small pieces and dust all surfaces in cocoa powder.
  7. Store in airtight container and refrigerate.

The result: a chewy, dense mochi with just the right sweetness for us.  I really like this recipe. So, was it easy? Well I  really thought it was, microwave cooking almost always means easy heating/cooking, right?... certainly not in this case, the ease stopped at the moment I put the bowl inside the microwave oven and pressed it's buttons! "No pain, no gain" was my mantra from start to end. The process got harder and stickier as the mixture starts to cook. I had some patience enough to finish the task but  I was complaining too much the whole time! More patience next time. If you really want to make this yourself, don't be discouraged, it's really not THAT hard...just a little bit and on that day, I was a tad whinier than the usual, so... :) But honestly, it was definitely well worth  the effort! :) We made and really enjoyed a delicious Cocoa Mochi!


My next project is  mochi ice cream! I did try making it using this batch after the cooked Mochi has cooled down, but the ice cream melted the second it touched the Mochi, but I am not giving up! I will keep searching for a recipe on how to properly do it. Please share a good recipe in the comment section if you have one!

Thursday, May 23, 2013

#127 Roasted Artichokes

It is also called globe artichoke, green artichoke or French artichoke; the ones pictured above are the  buds of the plant that  grows as high as 6.6 feet tall; these buds are picked before the flowers bloom and become inedible. Believed to be a native to the Mediterranean and Canary Islands, it is now largely cultivated in Italy, the world's biggest producer. In the United States, 100% of crops are grown here in California, 80% comes from the city of Castroville in Monterey county, the self-proclaimed "Artichoke Center of the World", which holds an annual  Castroville Artichoke Festival . I bought, cleaned and cooked fresh artichokes for the first time last week. It took a little bit more of work than I expected. Artichoke is a unique vegetable, both in looks and texture...and  some are extremely thorny! It pricked me the first time I held it...I didn't know it had sharp thorns on the tip of the leaves! I read somewhere that once cooked, the thorns will soften and are harmless...uh, after that sharp pain at the grocery store.. No, the thorns needed to go.

 I snipped the outer layers using a pair of scissors, 
and then removed the thorns by cutting the tips with a sharp knife.


             Then, I cut it into halves.


I soaked the artichokes in water mixed with the juice of two lemons, and after a few minutes, I drained  and pat it dry. Arranged on a greased baking sheet, I drizzled some olive oil, and seasoned it with salt and pepper. Then I roasted it in 425 F degrees, turning every 10  minutes, until tender.


Roasted artichokes  with Greek Yogurt Aoili. It tasted good. I learned that artichokes are very nutritious and have medicinal benefits as well. Studies have found this  vegetable to diminish the risk for arteriosclerosis and coronary heart disease by lowering cholesterol levels; it aids in digestion, hepatic and gall bladder function and it has also proved helpful for patients with functional dyspepsia, and may ameliorate symptoms of irritable bowel syndrome. The artichoke  leaves are  a great addition to our diet because according to a study done by the USDA, artichokes have more antioxidants than any other vegetable, it is high in fiber, good for the liver, etc. But I must admit that I like the taste of jarred marinated artichoke hearts better. I will search for other ways to cook it, hoping that my next experience with fresh artichokes  will change my opinion of it. Any suggestions?

#126 Trout en Papillote


We have two well-stocked, uber clean, private community lakes  for  recreation and so that  property owners and their guests can fish and eat fresh catch at 5,800 ft above sea level. It's like having a lake in the clouds filled with big fishes. Because nobody ever go fishing in the smaller lake, I assume I could sit there everyday and catch fish (If I ever will) to my heart's content. And so my fishing obsession began. Van's fishing in the mountains project, that's what I called it. Lots of free fishes to catch for our nourishment.. and for the people we love. LOL. We wished for a fishing pole for a long time, I imagined I would be able to fill the freezer with fishes, but once we finally owned one, we had no luck. I was so bad at it. LOL. It was tangled during the first day, so tangled that I had to cut it, and then also on that day, one of the cute  wild ducks got itself caught in the fishing line too, and again we had to cut it, luckily it swam out of it..what bad fishing luck we had on that day! I really wanted to catch a trout, or any fish to cook! Before we owned a fishing pole, we overheard a man who was catching fish like crazy that marshmallows are good bait. So we bought a huge bag, packed our new fishing pole, picked the spot where that man caught many fishes, and waited, I sat for a few hours, waiting for that hard tug, soon we ate most of the marshmallows, and the ones we put on the hook disappeared in minutes. No fish. We thought, better luck next time, we'll come back and fish again. Two weeks later, the fishing pole remained untouched. I almost gave up this whole "Van's fishing in the mountains project"..but then one night, we were invited to dinner, and then I learned that the Mckays (our hosts) always fish and always catch huge ones: trout, catfish, etc.  I shared our frustration, including the marshmallow bait idea, but I didn't tell them that 90% of which  ended up in our stomachs. The night went on, we played with their 3 chihuahuas, a very good dinner was served, then they told me they'll teach us how to fish..they mentioned power bait, hook, how to do this, and that...I was imagining my first catch as they were talking to me. I said I'll pay them a visit when they're fishing, they are lucky to  live across the street from the big lake. Before we went home, Sheryl gave me not one, but 3 of the big trouts that they caught. That was a really sweet gesture, and I was so thrilled to bring home the big fishes. The next day, I found myself staring at this huge trout for a long time and  had no idea know how to cook it besides grilling, which was out of the question on a very windy day. A quick search led me to a French dish called  Trout en Papillote. It had the word "trout" so I assumed it was referring to the same fish  resting on the sink, waiting to be cooked. I was excited when I found out that it simply meant, cook the trout deliciously in a foil pouch! :) I was very glad to find it, because it was an amazing way to cook fish. En papillote, means in parchment,  is a French method of cooking by placing uncooked fish, vegetables or meats inside an aluminum foil or parchment paper pouch, carefully sealed by folding and then baked, sealing it airtight will allow the  steam to cook the food. In France, they usually serve it with the fish still en papillote, and let the guests open each pouch. Great, great dish. Love the flavors of the fresh herbs and the fresh trout! Thanks to John & Sheryl Mckay.

TROUT EN PAPILLOTE

Ingredients:
 
fresh trout
1/2 cup white wine vinegar
salt
thin slices of butter
chopped fresh parsley
chopped fresh dill
white wine

Directions:
  1. Pre-heat oven to 400F degrees. Butter a large piece of foil; set aside.
  2. Clean trout, place in a shallow baking dish. Boil vinegar, pour over trout. Let stand, uncovered for 10 minutes.
  3. Drain fish. Lightly salt inside of the fish , place trout on top of butter slices in prepared foil sheets. Stuff trout with parsley and dill. Sprinkle with white wine.
  4. Fold foil around each fish, making it airtight.  Bake trout for 15-20 minutes. Salt and pepper to taste. Serve with boiled potatoes, lemon slices and horseradish cream.


I always remove scales before cooking fish, except when grilling.


Before
&
After


 This delicious dish makes me want to learn how to properly fish..
I will, soon. Fresh catch tastes the best!

#125 Greek Yogurt Dijon Aoili


Aoili is  a Provençal traditional sauce sauce or dip. If a quick preparation is desired,  most recipes commonly use mayonnaise, because it is mayonnaise-like; to make it from scratch, garlic paste, a good amount of olive oil, lemon and egg yolks are required . We completely removed mayonnaise from our diet a long time ago, and I didn't want to put too much oil in our food that night so I looked for a substitute; my guess was right, to make a healthier aoili,   fat-free greek yogurt can be used.  I found a recipe that uses dijon mustard, which I love, so I chose it as our dip for our roasted Artichokes. It  tastes great less the fat. :)

GREEK YOGURT GARLIC & DIJON AOILI

Ingredients:

1/4 cup fat-free greek yogurt
1/2 teaspoon dijon mustard
1/4 teaspoon minced garlic

Directions:
  1. Mix all the ingredients and let stand for 1 hour before serving.


#124 Chicken Piccata


Chicken Piccata  is an Italian dish, it consists mainly of butterflied chicken breast, coated and served in butter sauce whisked in the same pan the chicken is cooked. Traditionally in Italy, veal is used for Piccata. Our delicious Chicken Piccata had capers which added a pleasantly intense flavor to our dish. Very easy, it cooked very fast, the taste? Very, very good!

Yield: Serves 4
CHICKEN PICCATA

Ingredients

2 skinless and boneless chicken breasts, butterflied and then cut in half
Sea salt and freshly ground black pepper
All-purpose flour, for dredging
6 tablespoons unsalted butter
5 tablespoons extra-virgin olive oil
1/3 cup fresh lemon juice
1/2 cup chicken stock
1/4 cup brined capers, rinsed
1/3 cup fresh parsley, chopped


Directions:

  1. Season chicken with salt and pepper. Dredge chicken in flour and shake off excess.
  2. In a large skillet over medium high heat, melt 2 tablespoons of butter with 3 tablespoons olive oil. When butter and oil start to sizzle, add 2 pieces of chicken and cook for 3 minutes. When chicken is browned, flip and cook other side for 3 minutes. Remove and transfer to plate. Melt 2 more tablespoons butter and add another 2 tablespoons olive oil. When butter and oil start to sizzle, add the other 2 pieces of chicken and brown both sides in same manner. Remove pan from heat and add chicken to the plate.
  3. Into the pan add the lemon juice, stock and capers. Return to stove and bring to boil, scraping up brown bits from the pan for extra flavor. Check for seasoning. Return all the chicken to the pan and simmer for 5 minutes. Remove chicken to platter. Add remaining 2 tablespoons butter to sauce and whisk vigorously. Pour sauce over chicken and garnish with parsley. 
Recipe adapted from HERE


Capers are the salted and pickled caper bud of caper bush, also called Flinders rose. It is a common ingredient in  Mediterranean cuisines. It is also a distinctive ingredient in Italian cuisine especially in Sicilian and Southern Italian cooking. It is used in salads, pasta sauces, meat dishes, such as Chicken Piccata, the recipe featured above. READ MORE ABOUT CAPERS


Chicken Piccata is a delicious dish.


#123 Gnocchi in butter sage sauce


We made potato Gnocchi from scratch, and we learned that one of the best sauces to flavor the normally bland Gnocchi, is a simple sauce made with butter and sage. Luckily, I had fresh sage leaves, and so I used that instead of the dried variety. I pan fried the Gnocchi in butter until they are slightly brown. Depending on how you made it, sometimes Gnocchi can be really soft when heated again. So even if it was very tempting to stir it, I didn't until they are browned and firm enough again to retain it's shape. Then  I seasoned it and sprinkled thinly sliced fresh sage leaves. Delicious!

GNOCCHI IN BUTTER SAGE SAUCE

Ingredients:

Gnocchi recipe here
2-3 tablespoons of butter
1 clove of garlic, minced
salt 
pepper
fresh sage leaves, thinly sliced
grated parmesan cheese


Directions:
  1. In a pan, melt the butter, add the gnocchi, flip only once when they are slightly browned.
  2. Once the gnocchi are slightly browned on all sides, add the garlic, salt, pepper, parmesan cheese.
  3. Add more butter is desired. Sprinkle fresh sage leaves before serving.


#122 Baked Buffalo Wings


This is a good recipe, easy and quick to make. I loved the firm, well-seasoned crunchy skin of the baked buffalo chicken wings. It is so spicy good. I made the dip using Greek yogurt, minced garlic and chopped fresh parsley.

BAKED BUFFALO WINGS


Ingredients:

3/4 cup all-purpose flour
1/2 teaspoon cayenne pepper
1/2 teaspoon garlic powder
1/2 teaspoon salt
20 chicken wings
1/2 cup melted butter
1/2 cup hot pepper sauce

Directions:
  1. Line a baking sheet with aluminum foil, and lightly grease with cooking spray. Place the flour, cayenne pepper, garlic powder, and salt into a resealable plastic bag, and shake to mix. Add the chicken wings, seal, and toss until well coated with the flour mixture. Place the wings onto the prepared baking sheet, and place into the refrigerator. Refrigerate at least 1 hour.
  2. Preheat oven to 400 degrees F (200 degrees C).
  3. Whisk together the melted butter and hot sauce in a small bowl. Dip the wings into the butter mixture, and place back on the baking sheet. Bake in the preheated oven until the chicken is no longer pink in the center, and crispy on the outside, about 45 minutes. Turn the wings over halfway during cooking so they cook evenly.
Recipe adapted from HERE

Buffalo wings were created in Buffalo, New York. The residents of Buffalo generally refer to them as "wings" or "chicken wings" rather than "Buffalo wings," but never "hot wings."  There are five different stories about Buffalo wings' history. All remains unsubstantiated. Teressa and Frank Bellissimo claimed they made the first Buffalo Wings in Anchor Bay at this bar that they owned. The Bellissimos said that they was a mis-delivery of wings instead of necks and backs for their spaghetti sauce, so they made use of the chicken wings surplus that they had. Teressa then made the chicken wings to her patrons during a harsh snow storm in Buffalo and her son's college friends upon a late night arrival. A man named John Young claims credit for serving breaded chicken wings in a special "mambo sauce" a specialty at this restaurant during the 1960', which he registered as John Young's Wings 'n Things. READ MORE FROM OUR SOURCE

Thanks to whoever first made it. It's delicious!

Wednesday, May 22, 2013

#121 Basic Potato Gnocchi


I don't remember trying this pasta ever. It looked very good and fancy in the photos, so it was about time to try and also learn how to make it. Gnocchi is an Italian thick and soft dumpling, of probable Middle Eastern origin since the Roman times. READ MORE HERE It is a traditional pasta eaten as a first course (primi piatto).  This recipe is of  basic potato Gnocchi,  you can also use white flour, semolina, wheat flour to make it and then add ricotta cheese, fresh herbs and spinach if you like. Once made, add sauces to flavor. I used two large russet potatoes for this recipe, it was super easy to make!

BASIC POTATO GNOCCHI

Ingredients:

2 russet potatoes
2 cups of flour
1 egg

Directions:
  1. Bring a large pot of salted water to a boil. Peel potatoes and add to pot. Cook until tender but still firm, about 15 minutes. Drain, cool and mash with a fork or potato masher.
  2. Combine 1 cup mashed potato, flour and egg in a large bowl. Knead until dough forms a ball. Shape small portions of the dough into long "snakes". On a floured surface, cut snakes into half-inch pieces.
  3. Bring a large pot of lightly salted water to a boil. Drop in gnocchi and cook for 3 to 5 minutes or until gnocchi have risen to the top; drain and serve.
Recipe adapted from here


Very fun and delicious!

#120 Fried Chicken


A couple of weekends ago, we were invited to have dinner at the McKays and what a  delicious fried chicken they served us! We asked them how they made it so crispy and delicious, and John happily told us their secret. He said, he marinated the chicken in buttermilk overnight, then season with garlic salt and pepper.. then I imagined the rest.. coat with flour, then egg, then drench in bread crumbs before frying using vegetable oil in medium heat. So this week, I made fried chicken, it's been a while since I made it.  I also made my bread crumbs using left over breads that we baked and then we processed it using a ninja blender (yes Ninja is the brand name), you can also use a grater to make it. Since I did not have buttermilk, I learned that you can make your own by adding a tablespoon of lemon per cup of milk. So that's what I used to marinate the chicken overnight. The result was great! What I learned: never cook it in high heat to hasten the cooking process, patience is the key to a crispy, well seasoned and golden fried chicken.

FRIED CHICKEN

Ingredients:

chicken thighs and legs
buttermilk
flour for drenching
2 eggs, mixed 
breadcrumbs to coat
garlic salt 
pepper

Directions:
  1. Marinate chicken in buttermilk with garlic salt overnight
  2. Combine flour and pepper, drench chicken until covered.
  3. Dip the chicken in egg, then drench with breadcrumbs.
  4. Repeat process with all remaining chicken.
  5. Deep fry in vegetable oil.


bread + blender/food Processor = DIY  breadcrumbs


Fried chicken is thought to have originated in Europe.
 Read more on the history of Fried Chicken HERE


#119 Philippines' Pan de Sal

After failing to create Filipino Pan de Leche, I searched for more bread recipes. The next on my list was Pan de Sal, which I easily found the recipe and learned that it would be an easier bread to make. I think I am addicted to baking, one night, while in bed, I couldn't stop thinking about making fluffy Pan de Sal for breakfast- this wasn't me a month ago by the way, I didn't care for breads! Nowadays, I see breads and cakes in a different light, and I get excited at the thought of making bread- eaten once or twice a week at most before, lately it has been  consumed everyday, ever since we started making it from scratch.  We've become  little bread monsters and artisan pastry chef wanna-bes. We will be careful, I know, white flour is not good to binge on; but it is also certainly difficult not to eat more than two, or three, right after we bake these, oh sooo good, fluffy, authentic tasting Pan de Sal, the Philippines' favorite breakfast bread. I use to buy this for the entire family everyday when I was in grade school, starting when I was around 6 or 7 years old, every morning, I would walk 10 minutes to go to the fragrant small bakery, and walk 10 minutes back. Then eat a heavy breakfast (rice, fish, meat, eggs) plus the Pan de Sal, which is always on the table, and then get ready for school.  I haven't had this  in  a long long time, and my reaction after I took a bite of our warm, freshly baked Pan de Sal, was a mix of joy, sadness/homesickness, and a sense of fulfillment- knowing that I am able to make it  from now on. This bread will keep well in the fridge, and I learned that it also freezes well  for up to a month, just heat it up in the toaster or the microwave oven before serving. I made my own bread crumbs to sprinkle on top before baking it. I love it, and I'm excited to share this delicious bread recipe. 
Yield: 36 rolls

PAN DE SAL

Ingredients:

2 cups warm water (110 degrees F/45 degrees C)
2 teaspoons active dry yeast
1/3 cup white sugar
1/4 cup vegetable oil
1 1/2 teaspoons salt
6 cups all-purpose flour

Directions:
  1. Put the warm water in a small mixing bowl and add the yeast and 1 teaspoon of the sugar; stir to dissolve. Let stand until creamy, about 10 minutes.
  2. In a large mixing bowl, combine the remaining 15 teaspoons of sugar and the oil and mix until smooth. Add the salt, 1 cup of flour and the yeast mixture; stir well. Add the remaining 5 cups flour, 1/2 cup at a time, until the dough pulls away from the sides of the bowl.
  3. Turn the dough onto a lightly floured surface and knead until smooth, supple and elastic; about 10 minutes. Lightly oil a large mixing bowl, place the dough in it and turn to coat the dough with oil. Cover with a damp towel or plastic wrap and let sit in a warm place until the dough has doubled in volume; about 1 hour.
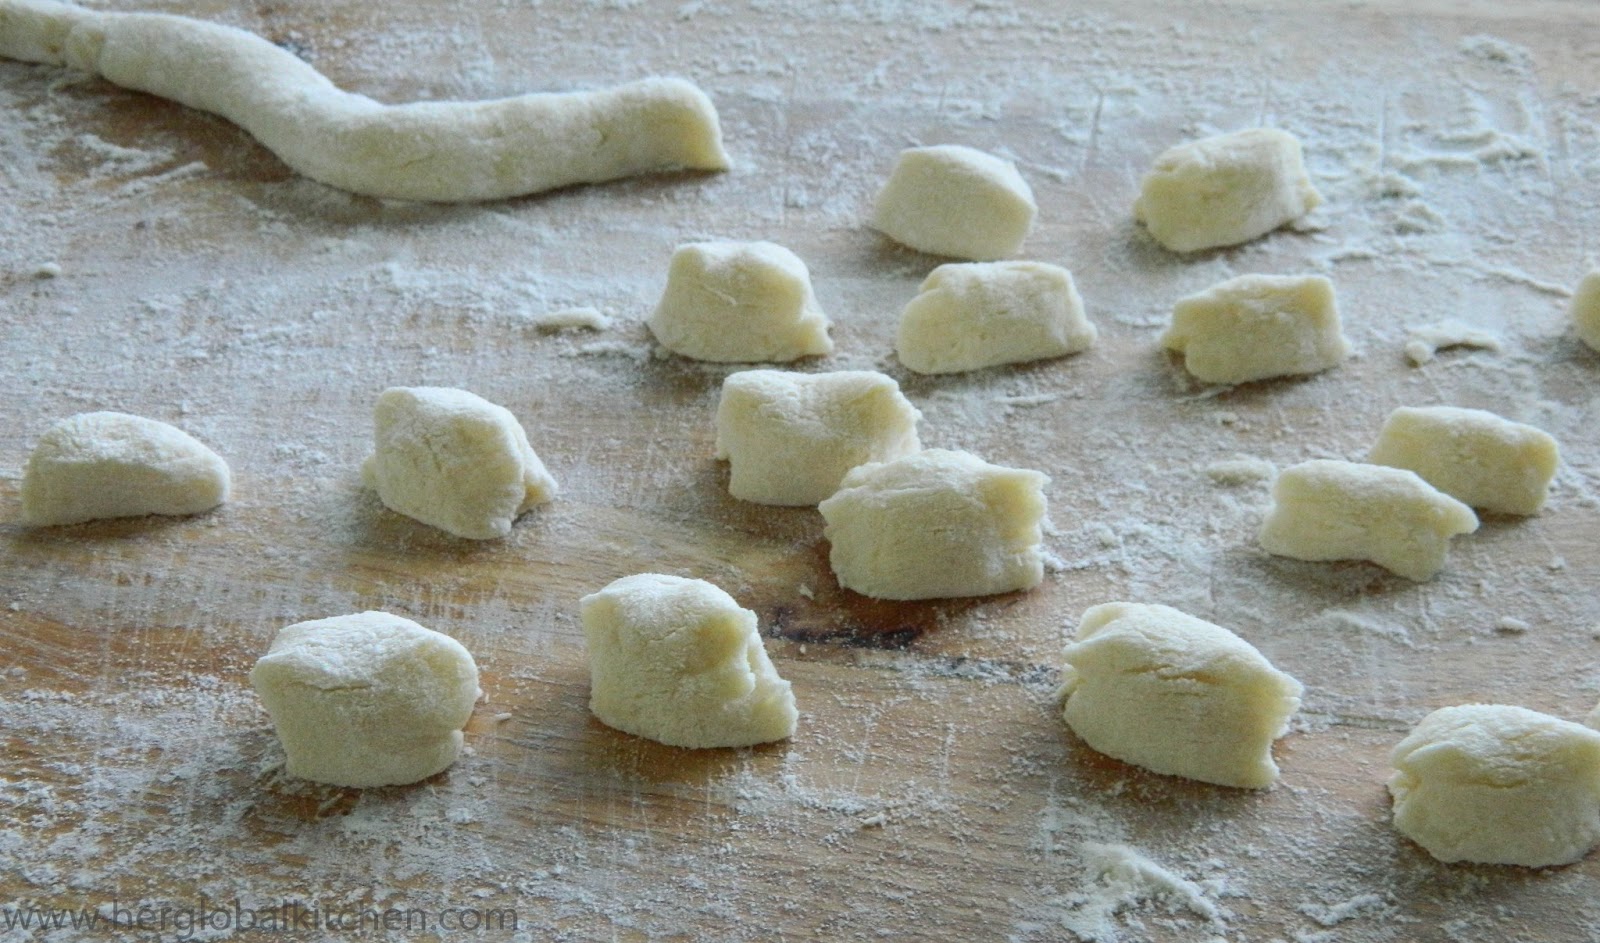
  4. Turn the dough onto a lightly floured surface and divide into 4 equal pieces. Form each piece into a cylinder and roll out until the 'log' is 1/2 inch in diameter. Using a sharp knife, cut each 'log' into 1/2 inch pieces. Place the pieces, flat side down, onto two lightly greased baking sheets. Gently press each roll down to flatten.
  5. Cover the rolls with a damp cloth and let rise until doubled in volume, about 1 more hour.
  6. Preheat oven to 350 degrees F (190 degrees C).
  7. Sprinkle the top with bread crumbs and bake at 350 degrees F (190 degrees C) until golden brown, about 20 minutes.
 
 Recipe adapted, but I slightly improvised it, from here


After the second proofing and ready to bake in the hot oven.
I don't know what caused the holes? Maybe because I'm baking at high altitude?


The beauties, fresh from the oven.


Our third bread made from scratch. Soft, fluffy, delicious!
We have a long way to go before we can produce perfect bread, every time. We are really lucky to find this recipe. My friend wished me  "happy baking" before I started manually kneading the dough, and it sure was a happy baking day, indeed! :)


#118 Mango Muffin Loaf


We were in the mood to make muffins, but after finding the box that I thought had enough blueberries, empty, I decided to use the fruit sitting in the   fridge next to it. Mango. Somebody told me it is one of the most delicious fruits ever, and I totally agree. My regret is that when I was living in the Philippines I never got to this point, where I would incorporate this fruit to salads, sauces and pastries. Before, mangoes were abundant, comes in baskets and costs nothing but just an effort to pick it from the low branches, or on the ground after it fell.  My Mama has several fruit mango trees, it's fruit is soo sweet, and my father has I think at least a hundred of mango trees, could be less- like 75; back then, we'd just simply slice and eat  5 to 10 mangoes after lunch. When I look at mango nowadays, I think of what dish I could make using a single mango, haha. It's quite expensive to buy too. This was a great experiment, one of the three mangoes I had on that day was put into good use, and what a joy to find a moist mango flavored muffin loaf, we love it!

MANGO MUFFIN LOAF

Ingredients:

1 1/2 cups all-purpose flour
3/4 cup white sugar
1/2 teaspoon salt
2 teaspoon baking powder
1/3 cup vegetable oil
1 egg
1/3 cup milk
1 cup chopped mango meat, or the meat of 1 whole mango
1/2 cup white sugar


Directions:

  1. Pre-heat oven to 400 degrees F. Grease loaf pan.
  2. Combine 1 1/2 cups flour, 3/4 cup sugar, salt and baking powder. Place vegetable oil into a 1 cup measuring cup; add the egg and enough milk to fill the cup; add the egg and enough milk to fill the cup. Mix this with flour mixture. Fold in blueberries. Fill muffin cups right to the top, and sprinkle with crumb topping mixture.
  3. Bake for 20-25 minutes in the preheated oven, or until done.


  Yummy!


#117 Baked Spinach Wonton Crisp


I had so much of spinach left in the fridge and I did not want to waste it nor freeze it  yet without using atleast half of it, so a quick search online led me to spinach wraps recipes. I found a great recipe but had one problem, I had no phyllo sheets and did not want to drive a total of 45 minutes just to get it from the store. However, I had a pack of  unopened wonton wrappers and found out that I can use it too, and then bake it. It came out really crisp and delicious. This will make a great appetizer dish, and the amounts in this recipe is great for entertaining.
Yield: Serves 10 or more
BAKED SPINACH WONTON CRISP

Ingredients:

2 cloves garlic, crushed
olive oil
2 bags baby spinach, cleaned
salt
1/4 cup ricotta cheese
1/4 cup neufchâtel cheese
1 tablespoon fresh basil, chopped
½ tablespoon fresh mint, chopped
sundried tomatoes, chopped
pepper
1 package square or round Wonton wrappers
Olive oil spray


 Directions:

  1. Sauté garlic in a small amount of olive oil. Add spinach and salt (to taste) and cook until spinach is wilted. Drain well, squeeze out water then let cool.
  2. Add ricotta, basil, mint, sundried tomatoes and pepper to spinach mixture and mix well.
  3. Lay out one wonton wrapper, keeping the rest covered with a damp cloth so they do not dry out. In the center of the wrapper, place  ½ tablespoon of spinach mixture. Spread water over the edges of the wrapper and fold into a triangle. Ensure that edges are tightly sealed by pressing down with a fork.
  4. To bake: Preheat oven to 400 degrees. Lay out wontons on a baking tray, and coat with olive oil spray. Bake for 15 minutes, turn over and bake for another 10 minutes, until crisp. 

Recipe adapted from here


Fun dish, this is one of my new to go snack/appetizer, and a great way to use up spinach before they go bad.

#116 Gizzard Yakitori


Although I know which part of the chicken it's gizzard is located, I prefer not to write about it right now; I suggest that you do not find out yet until you have tried this dish. :) What I can  tell you right now is this: Chicken Gizzard is chicken meat that tastes very interesting and very different from the thigh, or breast meat. Chewy yet very good. It is also always sold at a good price. For under $5, and even less than your favorite Starbucks drink, you can feed this delicious appetizer to six people. One of the few good meals for that price! I got a pack of 1.38 lbs for $2.29. Inexpensive, don't you think? :) Chicken gizzards bring good memories of life back in the Philippines, where it is mostly grilled and enjoyed by, I would guess 99% of the population. Since I really do not know what those roadside barbecue stands (where we usually bought it) from back home use in their sauce, I simply googled chicken gizzard recipes and learned that the Japanese also consume it, and call it "zuri" or "suganimo". Yakitori, Japanese for grilled chicken or skewered food in general usually use either salt for seasoning or tare sauce, a simple marinade consisting of sake, mirin, soysauce and ginger, before the meat is cooked in skewers on a hot grill; alternatively, you can use your oven, and add chicken thighs, livers or hearts for this recipe.
Yield: Serves 6
GIZZARD YAKITORI, in Tare Sauce

Ingredients:

1 pound chicken gizzards (or boneless thigh meat, livers and hearts)
1/2 cup dark soy sauce or tamari
1/4 cup mirin
2 tablespoons sake or dry sherry
1 tablespoon brown sugar
2 garlic cloves, peeled and smashed
1/2 teaspoon grated fresh ginger
Scallions, thinly sliced, for garnish.

Directions:
  1. Cut chicken into one-inch pieces and place in a shallow dish.
  2. In a small saucepan, combine soy sauce or tamari, mirin, sake or sherry, brown sugar, garlic and ginger. Bring to a simmer and cook for 7 minutes, until thickened. Reserve 2 tablespoons sauce for serving. Pour remaining sauce over chicken, cover, and chill for at least one hour (and up to 4 hours).
  3. If using wooden or bamboo skewers, soak them in water for one hour. Preheat grill or broiler. Thread chicken pieces onto skewers, and grill or broil, turning halfway, for about 3 minutes for livers, 10 minutes for gizzards and 6 minutes for thighs. Serve drizzled with reserved sauce and garnished with scallions.

Recipe adapted from here


 I brushed fresh chili paste to add some heat. Really good!

Tuesday, May 21, 2013

#115 One night, five different vegetable pizzas


Once you learn how to make your own pizza dough from scratch, the possibilities are endless. For very little cost, you can make any pizza that you want, even five different ones in one night! It's very quick and easy to do, even for a new baker like me.  Pizza dough keeps well in the fridge,  we had some uncooked dough that was a few days old so I decided  to experiment with different vegetables on mini pizza crusts,  the best tasting one will be made into a large pizza on the next pizza night. So I gathered all the vegetables that I had in the fridge, spinach, cherry tomatoes, arugula, onions, garlic, mushrooms and bell peppers. I also had some fresh and shredded mozarella cheese from the previous weekend, so I cut it into small slices and then joyfully worked on the dough- flattening and forming it is our favorite portion in the whole pizza making.
For our pizza dough, we used this recipe
FOR THE PIZZA SAUCE:

Ingredients:

8 ounces organic tomato sauce
24 pieces of sugar plum tomatoes (or cherry tomatoes)
4 pieces of large fresh basil leaves
6 pieces of fresh oregano leaves
1 small onion
1 small garlic clove
2 pieces of mint
1 tablespoon water
3 pieces of brown mushrooms
salt and pepper to taste
Directions: 
  1. In a food processor, blend sauce recipes until smooth, best if made in advance and chilled for 1 hour.
 
Pizza #1:
Pizza dough, pizza sauce, fresh mozzarella cheese. Sprinkled with fresh baby spinach leaves and fresh basil before serving.


Pizza #2:
Pizza dough, pizza sauce, fresh mozzarella cheese, fresh halved cherry tomatoes. Sprinkled with fresh basil on top before serving.


Pizza #3:

Pizza dough, pizza sauce, fresh mozzarella cheese, red onions, sliced olives and marinated artichokes.


Pizza #4:

Pizza dough, pizza sauce, fresh mozzarella cheese, sautéed garlic, red bell peppers, then topped with sliced fresh basil.


Pizza #5:

Pizza dough, pizza sauce, fresh mozzarella cheese, sautéed garlic, sautéed mushrooms in olive oil seasoned with salt and pepper, olives, artichokes, then topped with sliced fresh basil and arugula  before serving.

So, which one won? Hmm.. I love all of the above! While it is simpler to just mix all the vegetables  in one big crust, this was fun to make and eat. The smallest pizza in the group was big enough to divide into 3 slices, so it was really fun to have small sizes of 5 different kinds of vegetable pizza. All five won, so there will soon be another mini pizza night, I'll make it exactly like this but will most probably add more mini crusts topped with grilled meats and pineapples. :)

#114 Switzerland's Rösti


Rösti, is a dish native to the German speaking side of Switzerland. READ MORE HERE. It mainly consists of potatoes which are boiled, coarsely grated and then cooked in a pan. I liked this very much. The butter and white pepper made the potatoes taste so delicious.  Thanks to my 7-year old food stylist, we made a heart-shaped sunny side up eggs which are added on top with fresh parsley, both added a wonderful blend of flavors. Our Rösti is shaped into a patty, and looked like potato pancake. Quick tip: I learned that the potatoes must not be prepared in advance nor rinsed after boiling, because it will reduce the starch. After boiling, cool it, then peel and grate. This great dish can be added with anything you like for breakfast, and is also eaten as an accompaniment to meats. It is so tasty, I can eat it by itself again and agan. :)

Rösti

Ingredients:

russet potatoes, boiled, peeled and grated coarsely
butter
salt
white pepper
fresh parsley, for garnishing
eggs, sunny side up

Directions:
  1. Boil, cool, peel, coarsely grate, and then season the russet potatoes with salt and white pepper.
  2. In a hot pan, heat butter, then add the grated cooked potatoes, gently flattening it to form a round patty.
  3. Turn to cook the other side, serve immediately with sunny side up eggs and parsley on top.

Additional notes: 
If you are squeamish about runny eggs like me, I learned how to cook "well-done" sunny side up without burning the egg whites. I heat the pan with a little oil, and once I add the eggs, I lower the heat to it's lowest setting and then cover the pan. The result is a perfectly cooked egg whites and hardened yolks.


Delicious! :)


Sunday, May 19, 2013

#113 Spain's Pan de Leche


After I made bagels, there was no stopping my experiment with yeast. I have to admit, there were  3 packets of yeast that were dissolved in water and then poured down the drain because of my lack of know-how. The first packet was poured in the water that was too hot from the microwave oven, then the other 2  were discared also because I thought I did something wrong when I poured yeast in milk- it didn't foam. But I didn't give up. The next day, I bought another packets, and was more determined to make my favorite Filipino Pan de Leche. After proofing..which didn't foam much..I started mixing in a large bowl, and  kneaded it until smooth.Then I let it rise, it didn't double it's size..I know I did everything correctly, so I followed my gut and baked it anyway. I watched the bread with so much excitement, it's been at  least  18 months since I had it. After I took it out of the oven, I noticed the cracks, and I thought, well, maybe it is because I am baking at 5,800 ft above sea level, whereas the Philippines is at sea level. I tasted it, and it was very good and very sweet..but  was definitely not what I was looking for, it reminds me of a filipino bread  called Pantso.  Further investigation led me here, where the same recipe I used was adapted from. It states that it is a Spanish Sweet Milk Bread, not Filipino. I was relieved to see the similar cracks on the bread crust in their picture! Whew! In Spain, it is eaten for breakfast or "merienda" (afternoon snack). In the Philippines, we eat it mostly for merienda, but our Pan de Leche is very soft and fluffy, and it does not have cracks :) . I will be searching for the recipe and will share once I have successfully made it. This recipe is great, and I am happy to have discovered and made this bread. It's lovely!

Yield: 8 medium rolls

SPAIN'S PAN DE LECHE


Ingredients:

3 oz (100 ml) lukewarm milk
1 envelope (1/4 oz) dry yeast
1 egg
1/2 cube (50 gr) softened butter
1/3 cup (70 gr) granulated sugar
1 ½ cups (200 gr) unbleached white flour
2-3 Tbsp vegetable oil

Directions:
  1. Warm milk and pour into a glass measuring cup. Mix in the dried yeast until completely dissolved. Cover with a small kitchen towel and set in a warm place, away from drafts for 10 minutes.
  2. Cream butter and sugar in a medium size mixing bowl. Beat egg into the butter-sugar mixture. Add yeast-milk mixture and mix thoroughly.
  3. Add flour to mixing bowl, a 1/2 cup at a time. Mix in flour with a wooden spoon until dough forms a ball. If necessary, add additional flour 1 Tbsp at a time until soft dough is formed.
  4. Dust dough with 1 Tbsp flour. Cover bowl with a wet kitchen towel and place in a warm spot, away from drafts. Allow to rise for 30 minutes.
  5. After rising, dough will be soft, spongy and sticky. Coat hands with oil. Uncover and knead dough 5-6 times. Separate dough into 4 pieces. Form into balls or rectangles and place on cookie sheet or baking stone. Allow to rise for 15 minutes.
  6. Preheat oven to 400F . Bake bread for 7 minutes. Remove and brush bread with vegetable oil. Return to oven and continue to bake for 7-10 minutes. Remove when bread begins to brown. Allow to cool for 5 minutes, then serve with butter or jam.


My second bread made from scratch, we love it!